Hi there, Crafty Peeps - I hope you are all well.
Continuing my AECP journey has been more difficult this week - I have been struggling with a lack of creativity and motivation. However, I am lucky to have the support of a great group of both AECP students and Certified Educators, and their support has helped me to move past this 'blip'.
I think, also, that using a different style of stamp has helped, moving away from florals to something more abstract and making creative choices that are outside my usual comfort zone.
This week's class was 'Polychromatic', taught by the talented Nina-Marie Trapani. This class encourages students to play with colours, from monochrome to glorious multi-colour, and to develop their confidence in making colour choices. It leads on well from my previous two colour-based classes - 'In the Mood for Color', and 'Color My Day' - and if you are looking for guidance on how colour can influence your cardmaking, I can recommend taking all three classes.
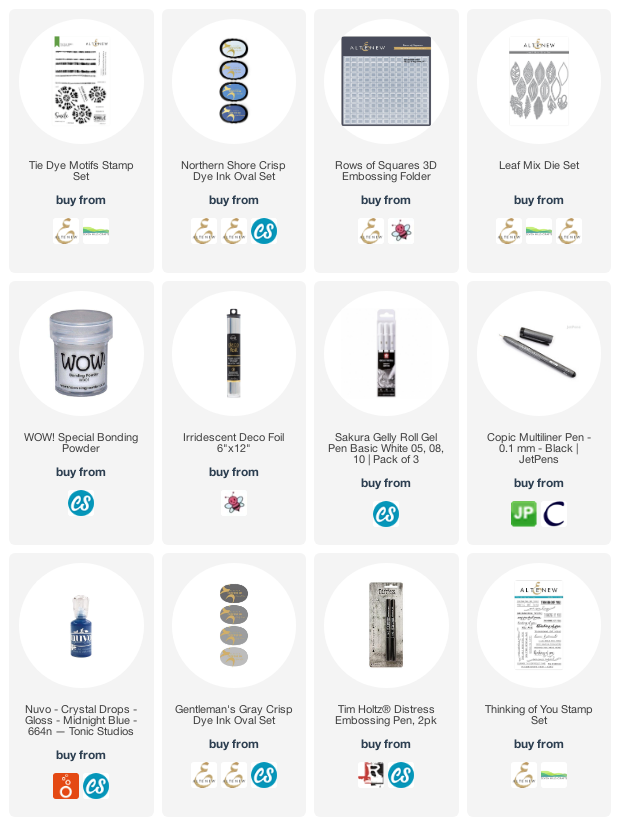
I love colour and have no problem using bright and bold colours on my cards. The thing I don't do very often is use a monochromatic scheme, so this is what I chose to concentrate on this week. I used the new 'Tie Dye Motifs' stamp set and Altenew inks from the 'Northern Shore' and 'Gentleman's Gray' sets.
I happened across these items when I was in The Range early this morning and today's cards were 'born'.
Card One
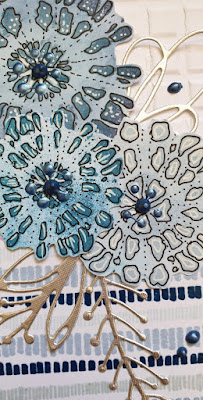
For my first card I used the stamps in their original configuration, three sets of two stripes, to cover the bottom of a slimline card with various shades of blue, and used some Wow Bonding Powder to add some Deco Foil Iridescent Silver to the top and bottom stripes. To complete the card base I used the 'Rows of Squares' embossing folder to add some extra texture to the white area at the top of the card.
I used the same shades of ink to stamp the three circular motifs and added some extra colour to the white background of each stamped image with a sponge dauber. Now, I know I said I was moving away from floral images this week, but once I had stamped the three circular patterns it occurred to me that they looked like flowers, so I ran with that thought and used a Copic fine liner pen to outline the patterns and add lines of dots to enhance the floral feel. I then did the same with a white Gelly Roll pen to lighten the effect.
I cut some of the decorative 'leaves' from Altenew's 'Leaf Mix' die set from silver mirror card - these quirky leaves are great for adding decorative accents.
I finished this card by mounting the card front onto a piece of dark blue cardstock (from my stash) and with a few Nuvo Crystal Drops in 'Midnight Blue'. I chose not to add a sentiment to the front of this card as space was tight and there was already quite a lot going on!
Card Two
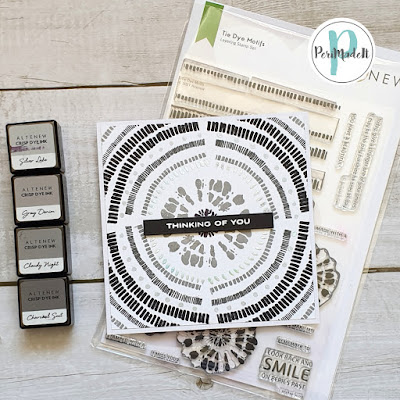
I cut a circle frame from some scrap white card and attached it with temporary glue to the outside of my MISTI lid. This then worked as a guide that allowed me to bend and line up the stamps more accurately than by eye. I used various inks from the 'Gentleman's Gray' ink set to create a circular pattern around the card, finishing off with the largest of the circular motif stamps in the centre.
I used a Tim Holtz embossing pen with some Wow Bonding Powder to add dots and marks with iridescent silver foil (as above) and cut the finished pattern to fit a 6" x 6" card with a narrow white border around the edge. I chose a sentiment from the 'Thinking of You' stamp set, which I embossed in white onto black cardstock and placed centrally across the card.
I was pleased with this card and happy that I had taken a risk in cutting apart the stamps in this way to achieve the result I wanted.
I hope you are having a great week and, until next time, keep crafting.


BEAUTIFULLY done! I thought of Tie Dye stamp set as soon as I saw the image, too! love how you made this your own with this beautiful cards-a Slimline and a Square!!! You aced this challenge and this is so awesome, Peri!
ReplyDeleteThank you Virginia. I knew as soon as I saw the plate, too! x
DeletePeri! You make the most inspirational cards! We are often too hard on ourselves, especially someone like you who always thinks out of the box and create cards a step above the rest. Friend, take time out to just reflect if you ever feel stuck. Because you have it in you in leaps and bounds. You are so very talented, more than you know. These cards speak for themselves! Absolutely fantastic! Thank you for sharing your work to the AECP assignment gallery.
ReplyDeleteThank you Erum - you're very kind. I think I just had 'a moment'! I will take your advice and step back if I need some time. xx
DeleteI'm amazed how the simplest thing can inspire such amazing cards. You've made something out of nothing and made beautifully too. These are very much 'up my street'; well done you.
ReplyDelete