24 May 2021

AECP 2 - Colour My Day

Hello Crafty Peeps, lovely to see you again. 

Today I''m on the AECP trail, with my submission for the class 'Color My Day', led by the very talented Therese Calvird, one of my favourite cardmakers. In this class Therese demonstrates how to choose and combine colours to give some interest to your cards and I have chosen to base my submission on lesson 2, 'Color Wheel'. 

I love colour and am not shy about using bold, bright and even clashing colours together on a card. But sometimes it pays to refresh some colour theory and so a colour wheel really comes in useful. They are readily available at most artist's supplies shops, but I bought mine from Amazon (link below). I particularly like the one I have as it is annotated with full instructions about using it, so there's no need for separate notes.

For my card, I wanted to use analogous colours, which are colours adjacent to each other on the wheel. I turned the wheel so that the arrow pointed to blue-green and chose yellow-green as my second colour.  This has to be one of my favourite combinations and one that I use often in my cardmaking. 

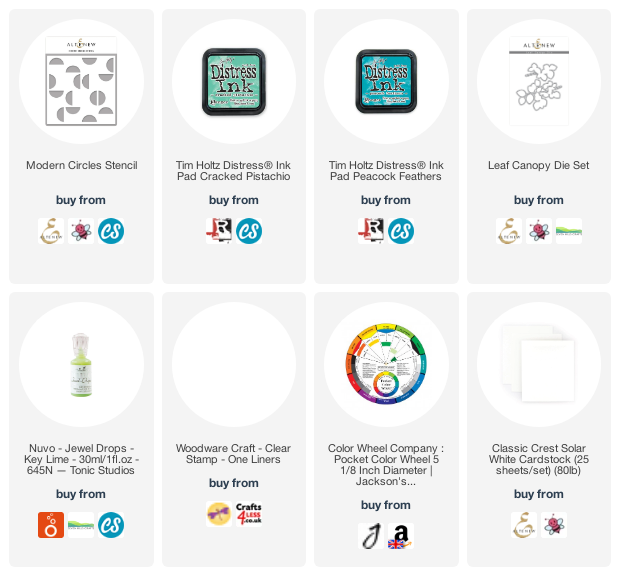
Here is the card I came up with, bold and bright and gender neutral. I used Altenew's Modern Circles stencil, which I inked with Cracked Pistachio and Peacock Feathers Distress Inks, on a 15cm (6") square of Nina Classic Crest Solar White 110lb paper. The resulting pattern is very simple but very effective. To complement it, I cut a circle from the square and then used two circle nesting dies to cut a frame for the opening. 

I lined up the square over the top of a 15cm square card base and drew a faint pencil line on the inside of the circle. Having removed the square I then lightly drew a freehand circle about 0.5cm (1/4") outside the one I had marked and then erased the inner line. I used Altenew Limeade ink to colour the card blank inside the pencilled line, swiping the cube straight to the cardstock.

I cut some fun foam to just smaller than a 15cm square and marked the position of the circle, which I cut away. I used the fun foam to give dimension when mounting the square onto the card base.

Using  Altenew's Leaf Canopy die set, I cut two sprigs of leaves from two shades of blue/blue-green mirror card and mounted these on the left of the circle, allowing them to overhang a little to cast a shadow on the background.

The sentiment is from Woodware's One Liners stamp set - a label style stamp set - which I stamped with black ink on white cardstock and added across the aperture. 

Rather than add sequins or gems, I used some Key Lime Nuvo Jewel Drops to add a little extra shine. To finish, I made a matching envelope and scored the flap for a little texture. 

My next AECP post will also deal with colour, its effect on mood and how that can be used to advantage in your cardmaking - it's fascinating.

 Until next time, keep crafting.


Supplies:

Please note that some of the links below are affiliate links and if you follow them and make a purchase I might receive a small commission, at no additional cost to you. This helps to support my blog. 

21 May 2021

Another Take on Angie's Girl

 Hello Crafty Peeps and welcome back. Thank you for stopping by.

My last post, in support of Mental Health Awareness Week, used the 'Birthday Girl Sass' digital image from Angie Blom Digital Designs. The hand across the heart of this classic beauty led me to using it as a caring, 'here for you' image, and the finished card was well-appreciated across my social media accounts (thank you!).  In case you didn't see it, here's a reminder:

The same image takes centre stage in today's card, as a 'same but different' comparison. Such a classic beauty would surely be the subject of a portrait painting, don't you think? I thought about the stately homes we had visited, where portraits of the family lined the walls, and so...

Once again, I paper-pieced the dress and coloured her skin and hair with Copic markers. 

One some green cardstock I used Altenew's 'Leaf Bed' stencil and some Ink On 3 'Shark Tooth White' fusion ink to create a simple background, which picked up the reference to leaves on the dress. I also felt that this gives the impression of a plush wallpaper. (As always, there's a list of the products I used at the end of this post.)

I masked the main image and used an Efco stencil (Filigree) and some blue-grey ink (I'm sorry, I forgot to note which one) to add a background to the image.

The frame is Pink Fresh Studio's 'Essentials Fancy Oval Frame' die, which I cut twice from white card. I used one of the cut frames over the image to work out the best placement and lightly drew inside the oval so that I was able to trim the finished image, just outside the pencil line, to the correct size for the frame.

I drew around the outside of one of the frame die cuts onto some thin grey cardstock and cut this out, just inside the pencil line, before gluing it under one of the white frames. I added these layers on top of the other white frame to give some dimension, before gluing the frame over the oval image. 

I mounted the leaf background onto a 5" x 7" card, which left a 1" strip at the bottom of the card, where I could put my sentiment. I didn't want it to be on top of the card, the way I usually would, because I wanted to retain the idea that the portrait was hanging on top of wallpaper on the wall. 

I couldn't resist adding a cheeky sentiment to bring the card to life, though! This one is from MFT's 'Sassy Pants Birthday Greetings' stamp set - it's a wonderful set for adding a bit of sass to a card.

So that's today's card - I hope you like it. 

 Until next time, keep crafting.


Supplies:

Please note that some of the links below are affiliate links and if you follow them and make a purchase I might receive a small commission, at no additional cost to you. This helps to support my blog. 

13 May 2021

Support for Mental Health Awareness Week, 10-16 May 2021

Hi there, Crafty Peeps, and, as always, a warm welcome to my little place on the web. This week in the UK is Mental Health Awareness Week so I thought I would make a card with this in mind. 

I know that a lot of crafters use their craft, whatever that may be, to help them deal with their mental health challenges and making cards often fills that role for me too. I find that having something creative to focus on when life feels out of control really helps to get me through the bad days. Like many of you out there, this past 15 or so months have not been easy: shielding and isolating have not been easy and other life events along the way have really added to my own mental health challenges. At times I stepped away entirely from creating as my 'mojo' ran for cover, and yet at others I found myself really inspired and almost overwhelmed with creative drive.  Things have evened out a little now and I'm back 'in the driving seat'; the bad days are fewer and my focus is better and I shall always be grateful for the support and encouragement of family, friends and the crafting community.

In colour psychology, blue is seen as the colour of calmness and serenity. It is often described as peaceful and tranquil, and is often seen as a sign of stability and reliability. Therefore, I thought this would be a perfect colour for this card. 


I used The Stamp Market's pale blue card as a background and the new Tim Holtz ink colour, Salvaged Patina, as a starting point. To create the background I used a mandala stencil from Taylored Expressions and inked it first in Salvaged Patina Distress Ink. I then moved the stencil just a little upwards and inked again with white fusion ink from Ink On 3's Atelier range. This softened the blue ink but allowed a little shadow to form, which gave a feeling of depth to the background. (A list of all the things I used is at the bottom of this post.)


The image is from Angie Blom Digital Designs, and is called 'Birthday Girl Sass'. However, this is quite a demure image and the touching of hand to heart seemed to sum up the sentiment well. I paper-pieced her dress and coloured the rest with Copic markers. I also used Copic BG11 to colour a piece of white cardstock to co-ordinate with the card and used this to stamp my sentiment, which is from The Stamp Market's 'More Modern Messages' stamp set. 


The little mother of pearl discs are from my stash, but you can find similar sequins at Lucy's Cards. 

This will be a perfect card to send to anyone who is struggling, to let them know that we are thinking of them. It shouldn't be too much longer before we can give them a hug in person, and I can't wait.

I'm going to enter this card in the following challenges:


Until next time, stay safe, be happy, and keep crafting.


Supplies:

Please note that some of the links below are affiliate links and if you follow them and make a purchase I might receive a small commission, at no additional cost to you. This helps to support my blog. 

09 May 2021

AECP 2 - Beautiful Details

There's no denying that Altenew's floral images are beautiful, but in this class Marika Rahtu shows us her tips and tricks for enhancing them and making them your own, adding those extra small touches that will take your cardmaking up a level. 

Today, I've chosen to showcase my take on on lesson 3, Majestic Bloom, in which Marika shows us how to use another colouring medium on top of a layered stamp for some extra depth and detail. 

For this card I have used the Flower Bunch Simple Layering Stencil Set, which initially I coloured with Altenew inks (unfortunately, I forgot to make a note of which inks I used). Then I took my Prismacolor pencils  and brought some depth into the image by adding darker shades on top of the inked flowers and leaves, and a little highlight with a white pencil. I also coloured the area around the bouquet with blue pencil and white spirit (Gamsol) to soften and blend colour.


Once I was happy with the image I cut it with Pinkfresh Studio's Fancy Oval Frame die, which resulted in a separate outer frame and an inner oval. I also cut several extra frames from some pearlised card, plus three from white card, and an additional 6" x 6" card panel from white linen effect card, all from my stash. 

I placed the oval image piece in position on the extra card panel and drew around it lightly with a pencil. I removed the image then cut out the oval with scissors, cutting just outside the pencilled line. This meant that once the coloured frame was on the card, the edge of the central oval was covered. Then I held this cut panel against the card front and once again drew very lightly around the inside of the oval so that I could see where to glue the coloured oval to the card front. I adhered the image directly to the card front - no dimension needed as that would be provided by the card panel and frame.


I completed the frame by gluing and stacking together the three plain white frame die cuts and then added the coloured frame on top, for dimension. I set this aside, under a heavy book, to dry thoroughly and flat (about 30 minutes). 

Meanwhile, I put together the additional card panel. I glued the pearlised frames around the panel, hanging them off the edge and trimming them to fit. Their slightly creamy colour lends a little contrast to the card background. I attached the panel to the card front with foam tape and then adhered the coloured frame on top of that.


Obviously, there were sequins from Lucy's Cards, and a sentiment that I printed and foiled with my laminator. 

I hope you enjoyed this post - it feels good to be back on track with the AECP classes.

Until next time, keep crafting.


Supplies:

Please note that some of the links below are affiliate links and if you follow them and make a purchase I might receive a small commission, at no additional cost to you. This helps to support my blog. 


07 May 2021

Digitals, Blom Style!

Hello there, Crafty Peeps, and thank you for visiting - it's always great to know you're here.

Today I'm continuing my love affair with digital stamps, with images from Angie Blom Digital Designs. I only recently discovered this company through their Facebook page and am delighted with the find. I'm particularly fond of Angie's Girls, modern young women who are perfect for any number of occasions. 

One of the great things about digital stamps is that they allow all sorts of manipulations - flipping, resizing, merging, and digital paper-piecing, to name a few. Today's card features a digitally paper-pieced top, but the rest of the colouring is with Copic markers. A list of other supplies used is at the bottom of this post. 


This image is 'New Year's Sass', a wonderful Marilyn Monroe-esque bombshell. I've teamed her with Heffy Doodle's 'Circles of Life' stencil, which I've inked with inks from Altenew's 'Pocket Full of Sunshine' stamp set.


For a change, I decided to stamp my sentiment vertically. This sentiment is from The Stamp Market's 'Modern Messages' stamp set. Each stamp is a set of two sentiments - a big and bold one and a smaller sub-sentiment - and I chose to ink up only the big and bold part for this card, using a piece of Post-It paper to mask the subsentiment when inking.


I hope you like this sassy Miss as much as I do. 

Until next time, keep crafting.


Supplies:

Please note that some of the links below are affiliate links and if you follow them and make a purchase I might receive a small commission, at no additional cost to you. This helps to support my blog. 


06 May 2021

I Arted and Made This For You!

Oh my! What a break that turned out to be. Hello, Crafty Peeps, and thank you so much for your patience. It has been a strange few months. I've had covid, lost my job, and felt drained for such a long time. BUT, I'm feeling much brighter now and ready to get back to being creative, and looking forward to resuming my AECP journey.

I'm sure many of us have had some struggles over the last year or so and my heart and hope goes out to all those affected, however that might be.

So, on a happy note, here are my first cards in some time, and I thought I would return to my 'roots' at Mo's Digital Pencil. I used to be a member of Mo's Dream Team back in my cardmaking history and have always loved her digital stamps. 

If you have not yet tried working with digital stamps then I would urge you to have a go. There are some great tutorials on YouTube and around the internet, and it is easy to get hooked! I began using digital stamps (digistamps) because I wanted to make cards but could never get satisfactory image results with traditional rubber stamps - and there were no stamping platforms in 2009! The MISTI has since revolutionised my physical stamping but I haven't lost my love of digis!

This image is called 'Flying Crayons' and you can purchase it here. I thought it was very apt for my return to creating. The sentiment is one I typed up and foiled with my laminator - I love it! 

The image is coloured with Copic markers and the paint splatters were 'made' with a stencil - full details below.

I decided to use the same stencil to dry emboss the card front but the paper creased quite heavily as it rolled through my machine. At first I thought it was ruined but then realised that the extra creases simply added more texture and so I used it behind the main image, which I cut to a circle and popped up on foam. 

I think cutting the circle and liberally scattering the sequins around it give the image a sense of motion and lively creation.

I added the cute foiled sentiment and a bright yellow envelope to finish.

Thank you for stopping by - I always appreciate your visits. 

Until next time, happy crafting.


Supplies:

Please note that some of the links below are affiliate links and if you follow them and make a purchase I might receive a small commission, at no additional cost to you. This helps to support my blog. 

It's a short list for this post!