Hello crafty peeps! I hope you have had a good week and you and yours are safe and well. It's time for another AECP submission and this is a favourite - shine and bling!
Given that I live in the UK, life is dark and wet at the moment, and the coronavirus situation is definitely not helping. So this class, here, is great for lifting the spirits, because who doesn't like a little bling?
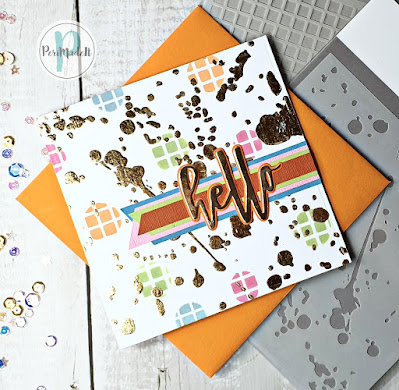
I love the Altenew Splatter Stencil, so I chose this as my background. I cut a piece of Neenah Classic Solar White 300gsm (110lb) card to 6" x 6" and used some tape to adhere the stencil over the top. I used some Decofoil Transfer Gel Duo and swiped a thin and even layer over the stencil with a spatula. The gel can be a little difficult to work with until you get used to it, so make sure that your stencil is properly covered before scraping the excess back into the jar. Make sure also to wash your stencil and tools straightaway, as they will be really difficult to clean if you let the paste dry on them.
This paste is a little bit of crafting magic as it allows foiling and flocking with either heat or pressure, which is useful if you don't have lots of tools in your craftroom.
Now for the hard part - well, it is if you're impatient like me - let the paste dry thoroughly, which takes around an hour, and don't be tempted to rush ahead with the next step. Once the paste is ready it will be clear and sticky to the touch. It shouldn't be wet at all. Your patience will be rewarded!I
I already had some gold foil in my stash from years ago - you can buy it easily though. I cut a piece of foil just slightly larger than my paper and placed it gold side up on top of the sticky gel. I took an A4 piece of vellum and folded it in half, placing the stencilled piece into the middle. I then ran the sandwich through my die cutting machine - I think I used my metal shim to make sure there was sufficient pressure applied. TIP: if your plates are particularly badly marked from previous cuts, pop a piece of ordinary copy paper between the foil and the vellum to prevent the marks transferring with the foil.
Carefully peel back the foil and, voila, a beautifully foiled stencil! I was so excited to see the result!
But what to do with it now? It had to be something fairly abstract, I felt, so I dug out a couple more stencils: Altenew's Grid Stencil and Tim Holtz's Splotches Stencil. I taped down the grid stencil over the foiled piece and taped off a couple of splotches on the other stencil so that I didn't have to worry about stray ink. I used Distress Oxide Inks in Dried Marigold, Picked Raspberry, Shabby Shutters and Speckled Egg to ink through the splotches and grid in a fairly random fashion.
I chose some scraps of card in coordinating colours and cut some strips into banners, layering them to provide some contrast below the gold (yes, more bling) 'hello' die cut from Altenew's Hello and Hugs die set.
A colourful envelope completed the card.
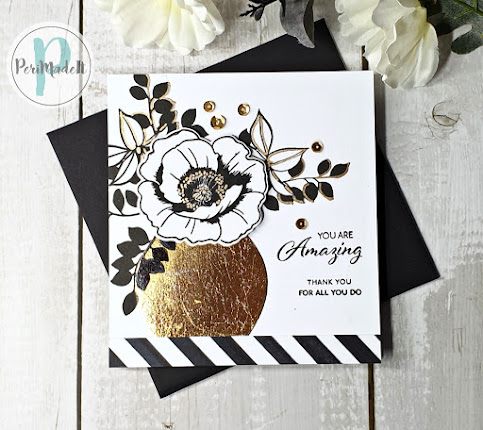
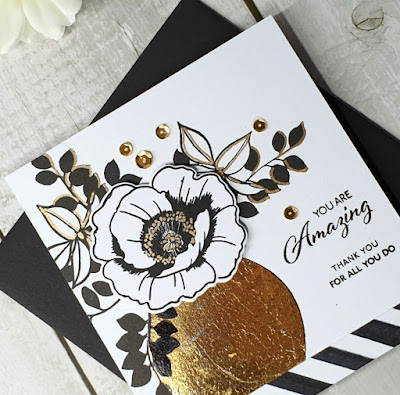
I used all sorts of shiny things on this card - foil, sequins and metallic pen. I used the Mod Vases Mask Stencil with the Decofoil Transfer Gel Duo, and foiled the vase in the same way that I foiled the Splatter Stencil above. I stamped leaf sprays from the Wallpaper Art stamp set in black ink - the ones that laid over the gold wouldn't dry properly so I dabbed off the wet ink and used a black Copic marker to draw in the missing leaves. If I had been able to find my Stazon ink pad it would have been the better choice in this instance.
I stamped the smallest image from the stamp set and cut it out with the coordinating die, adding a few centre details with a gold Gelly Roll pen, which I also used to draw some gold highlights on the leaf sprays.
I popped the flower up on some 3D foam pads and added a strip of striped paper to the bottom of the card, for the vase to 'sit' on.
The sentiments are from the Kind Reminders stamp set, and the gold sequins are from my stash. A black envelope, this time, for dramatic effect!
 |
Thank you for taking the time to read - do leave a comment to let me know you were here.


Ok, that second card! I am BLOWN AWAYYYY. Even thought about making videos, Peri?
ReplyDeleteThank you for submitting your gorgeous work to the AECP assignment gallery.
Thank you, Erum. I am hoping to move into videos soon, but things are pretty hectic here at the moment and I need more time than I have at the moment to make a good job of it. Watch this space, as they say!
DeleteI don't know where you get your ideas Peri but I love both of these - I particularly love the spattered background on the first one. I look forward to seeing the next installment.
ReplyDeleteThank you, Niki - so lovely to know you like them. X
Delete