Hello crafty peeps! Making up for the long gap between previous posts, I'm bringing you my second post this weekend, and another submission for my AECP Level 1. This time we're playing with inks with the Irresistible Inking Techniques class. This 4-lesson class explores ways of stretching the use of your ink pads to create different effects, leaving one-colour stamping behind.
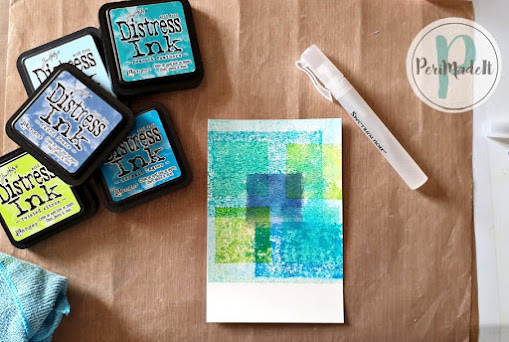
I chose to use my ink pads and my acrylic blocks to create a background for my card. I selected a few sizes of block, which I covered in ink, lightly sprayed with water, then applied the ink to some watercolour paper.
I also coloured another piece of watercolour paper, and then used the Frosted Garden stamp set to stamp a floral spray with Versamark ink before heat embossing with white embossing powder.
I cut out the stamped image with the coordinating die, together with an extra two layers in white card and one in navy blue card. I layered and glued the two white die cuts, added the navy blue on top, and then finished off with the stamped image. This gives a more interesting effect when seen from the side.
I cut down the inked panel and added it to a white card base, leaving a narrow border on all sides. I added a triangular frame cut from navy blue card and stamped a sentiment from the Frosted Garden stamp set, before adding the stamped image. The watercolour paper gave everything a slight texture, which I enhanced by brushing over the stamped image with a Spectrum Noir Crystal Clear sparkle pen, although it is difficult to see on the photo.
A few dots of Nuvo Jewel Drops in Sea Breeze and a handmade coordinating envelope completed this project.
This first example uses Distress Inks (listed below) to create the effect. A final all-over layer of Tumbled Glass smoothed and softened the effect, which I like. I stamped a couple of leaf clusters from the Leaf Canopy stamp set with Versafine Onyx Black ink and heat embossed with clear embossing powder. Then, using a water brush, I applied a light wash of water to each leaf, blotting off with kitchen paper, to create a slightly lighter shade of ink.
I added some dots with a white gel pen, and heat embossed a sentiment from the Leaf Canopy stamp set.
I liked this effect so I changed to Distress Oxide inks (as pictured) and a piece of gloss paper from my stash, and created another background.
I used the Frosted Garden stamp set again and Picked Raspberry Distress Ink to stamp flower clusters over the background. I love this sentiment from the Woodware Hand Drawn Sentiments set and thought it perfect for this simple card.
Tumbled Glass, Speckled Egg, Peacock Feathers, Broken China


Love 'em! Clever techniques but also made into beautiful cards I particularly love the simplicity of the last two 🙂
ReplyDeleteGoodness! I am blown away by all your gorgeous creations!! Incredible work and a very well written post. Love the colours you have used.
ReplyDeleteThank you for submitting your work to the AECP assignment galley. Keep up the good work!
Thank you so much, Erum!
DeleteAwesome techniques, love your beautiful cards and great explanations. Thanks for sharing your incredible talents.
ReplyDeleteHi Melissa, thank you for your kind comments.
Delete